


FraudFighter Device Maintenance: Cleaning, Bulb Replacement, & Updates
To ensure your FraudFighter equipment remains effective and reliable, routine maintenance is essential. Proper care extends the life of your units and maintains peak performance for document and currency authentication. Below, we’ve compiled a comprehensive guide for maintaining your FraudFighter devices—whether it's replacing bulbs in UV detectors or cleaning scanners.
General Maintenance Overview
FraudFighter devices are engineered to be low maintenance, but periodic upkeep is crucial to avoid performance degradation. The three main categories of maintenance are:
- Cleaning optical and sensor components
- Replacing UV light bulbs and ensuring functional hardware
- Ensuring software (when applicable) is up to date
UV Detector Maintenance (UV-16 & POS-15)
Bulb Replacement Schedule
Recommended Replacement Frequency: Replace bulbs every 1-2 years under standard use.
In high-use environments (e.g., retail counters or ID checkpoints), consider replacing bulbs as often as every 3–4 months to maintain reliable UV spectrum output.
Why It Matters: Even if the bulb emits a visible glow, an aging UV bulb may not emit the correct UV spectrum required to authenticate documents.
How to Replace T5 UV Bulbs
- Turn off and unplug the FraudFighter unit.
- Grasp one end of the bulb and rotate a quarter-turn clockwise to align the prongs with the loading slot.
- Slide the bulb out carefully.
- Insert the new bulb, aligning the prongs with the grooves in the socket.
- Rotate counterclockwise until the bulb clicks into place.
- Turn the device back on to ensure it’s working.

UV Bulb Not Working?
- Only one bulb works? Swap positions to test if the issue is with the bulb or socket.
- Neither bulb works?
- If it’s a new unit (purchased in last 30 days), contact Fraud Fighter for a replacement.
- If under 3 years old, it may be under warranty—check the production date and contact support at support@fraudfighter.com.
Note: Some bulbs may rattle due to manufacturing particles—this isn’t necessarily a defect if the bulb works normally.
CT Series Scanner Maintenance (CT-600, CT-250, etc)
While CT units are mostly maintenance-free, occasional cleaning will enhance reliability.
Recommended Cleaning Frequency
- Every 6 months or more often in dusty or high-use environments.
Cleaning Procedure
- Power off the device.
- Open the scanner top like a car hood.
- Use a damp cloth with water, rubbing alcohol, or glass cleaner to gently wipe:
- Magnetic and optical sensors (top and bottom)
- Internal belts
- Guide wheels
- Remove any visible dust.
- Snap the lid shut and ensure a secure seal.

Unit Updates
CT counterfeit detectors use software to recognize specific security features in U.S. currency. While updates are occasionally required when new banknotes are released, most CT models should already be fully up to date at this time, as no new USD bills have entered circulation recently.
Current Update Status by Model
- CT-250: No updates needed.
All CT-250 units are current and do not require software updates at this time.
- CT-600: No updates needed.
If your CT-600 can read the current $100 bill (with the blue 3D security ribbon), then it is fully up to date. There have been no recent currency design changes requiring an update.
- CT-550: Updates are likely not needed
- To check your version, turn the unit OFF, then ON—a software version will appear during startup.
- If the version reads C06 or higher, your device is current.
- If older, reach out to our support to get the latest update.
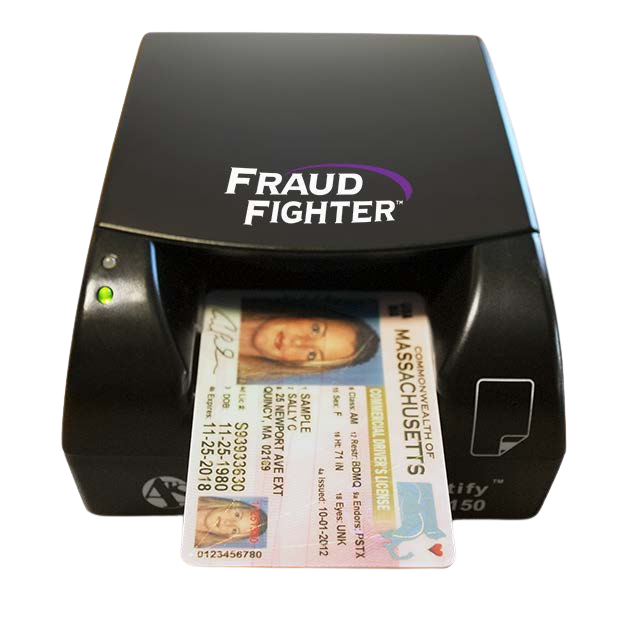
ID-150 & PAL-ID1 Maintenance:
Routine cleaning is essential to keep your scanner feeding documents smoothly and producing high-quality images. The following components should be cleaned regularly based on the usage schedule below.
Recommended Cleaning Schedule
| Component | Cleaning Interval |
|---|---|
| Feed Rollers | Every 10,000 scans or monthly |
| CIS (Image Sensors) | Every 10,000 scans or monthly |
| Magnetic Stripe Reader | Every 10,000 scans or monthly |
| Document Sensors | As needed |
Tip: It's recommended to clean all applicable components during the same maintenance session for efficiency.
Cleaning the Feed Rollers
Dirty feed rollers can cause slippage, misfeeds, or jams. Clean them using water- or alcohol-based wipes (e.g., screen cleaning wipes or alcohol preps). Do not use ammonia-based cleaners.
Steps:
- Power off the scanner.
- Open the top cover to expose the feed rollers.
- Locate DIP switch #3 on the back of the scanner. Flip it ON (down) to enable roller cleaning mode.
- Power the scanner back on – rollers will begin to move back and forth.
- Gently press a cleaning wipe against the rollers while they spin.
- Power off the scanner once cleaning is complete.
- Return DIP switch #3 to the OFF (up) position.
- Close the cover.

Cleaning the CIS (Image Sensors)
If you notice lines or artifacts in scans, the CIS (Contact Image Sensors) may be dirty. There are typically two CIS bars on the PAL-ID1 and three on the ID-150.
Steps:
- Power off the scanner.
- Open the cover to access the white CIS bars on the top and bottom of the scan path.
- Using a water- or alcohol-based cleaning wipe, gently clean each CIS bar.
- Discard the wipe after use and close the cover.

Cleaning the Magnetic Stripe Reader (ID-150 only)
To maintain accurate stripe reads, regularly clean the magnetic reader.
Steps:
- Power off the scanner.
- Open the cover to locate the magnetic stripe reader.
- Use a cleaning wipe or alcohol prep to wipe the reader.
- Discard the wipe after use and close the cover.

Cleaning the Document Sensors
The document sensors are small holes near the feed path that detect document presence. Dust can block the light path and cause feed issues.
Steps:
- Power off the scanner.
- Open the cover to locate the sensor holes (before and after the first roller, top and bottom).
- Use compressed air to blow out any dust. Keep the can upright to avoid residue.
- Close the cover.
AT10K Maintenance:
The AT10K is designed to be low-maintenance, with no user-serviceable internal parts. However, routine cleaning of the glass surface is essential to ensure optimal performance and image clarity.
⚠️ Do not open the device or attempt internal repairs. For extensive servicing, the unit must be returned to the service depot.
Cleaning Guidelines
- Use only a microfiber cloth (such as the one provided with the unit).
- Avoid abrasive cleaners, alcohol-based solvents, or paper towels, as these can scratch the glass or damage its oleophobic coating.
Step-by-Step Cleaning Instructions
- Power off the reader using the switch on the back panel.
- Wipe the document window (glass surface) with a clean, dry microfiber cloth.
- For smudges or stubborn dirt:
- Lightly dampen the microfiber cloth with a mild, water-based glass cleaner (touchscreen-safe).
- Gently clean the glass, avoiding excess moisture.
- Ensure no streaks or smudges are left on the glass.
- Clean the body of the device using a slightly damp microfiber cloth.
- Power the device back on using the switch.
- Confirm that the power-up self-test is completed successfully

Software & Firmware Updates
For PALIDIN-connected devices or units with integrated software (e.g., Desktop, WebID, Mobile, etc): Most units should have auto-updates enabled, if you are experiencing issues or want to ensure you're running the latest version, reach out to our support: support@fraudfighter.com
What are updates for?
Updates may include:
- Improved document database
- Performance optimizations
- Security patches
- New features
👉 Visit your PALIDIN portal to connect with our support team.
Warranty & Support
- Warranty devices range from 1-year to 5-year warranties.
- For returns or replacements, contact FraudFighter Support at (800) 883- 8822 (M–F, 7am–5pm PST).
- Keep your unit’s production date or barcode serial number handy for faster service.
Quick Reference Maintenance Schedule
| Component / Device | Task | Frequency | Notes |
|---|---|---|---|
| UV Series Detectors | Replace UV bulbs | Every 2 years (or 3–4 months in high-use environments) | Even glowing bulbs may emit insufficient UV over time |
| Check for bulb failure | As needed | Swap bulbs to test if only one is working | |
| CT-250 / CT-550 / CT-600 | Software update check | When new bills are released | Most CT-250 and CT-600 units are up to date |
| Cleaning sensors | Every 6 months | Use a damp cloth with water, rubbing alcohol, or glass cleaner to gently wipe | |
| ID-150 / PAL-ID1 Scanners | Clean feed rollers | Every 10,000 scans or monthly | Enable DIP switch #3 for roller motion |
| Clean CIS (scan heads) | Every 10,000 scans or monthly | Clean all white bars (2 on PAL-ID1, 3 on ID-150) | |
| Clean magnetic stripe reader | Every 10,000 scans or monthly | ID-150 only | |
| Clean document sensors | As needed | Use compressed air | |
| AT10K Document Reader | Clean glass scanning surface | Weekly or as needed | Use microfiber cloth, no harsh cleaners |
| Clean reader exterior | Weekly or as needed | Lightly damp microfiber cloth | |
| All Devices | Check cables / physical damage | As needed | Replace frayed cables or cracked housings |
| Verify firmware/software version | Every 3–6 months | Especially after new document releases |
With these best practices, your FraudFighter devices will stay in peak condition, helping you detect fraud with confidence and accuracy. If you ever need help, our support team is just a call away.
Need to connect with support?
Call: (800) 883-8822
Email: support@fraudfighter.com
Monday-Friday 7AM - 5PM PST